The Synchronization App is a fantastic way to work from many different devices with always the latest updates. You can compare it with a DropBox option, where you can Sync all your documents to a specific folder. And the compatibility between Apple computers and Microsoft computers is absolutely amazing.
To get the Sync Application installed please watch this video SYNC APP, or follow the following steps:
Step 1
Log in on the Customer Portal https://my.dyslexiefont.com
Once you are in, click on the left menu Dyslexia Office
Step 2
Download the Synchronization Application called NextCloud and Install it on your computer, see the picture below.
Step 3
Copy the correct URL you can use to connect with your online cloud, see the picture below.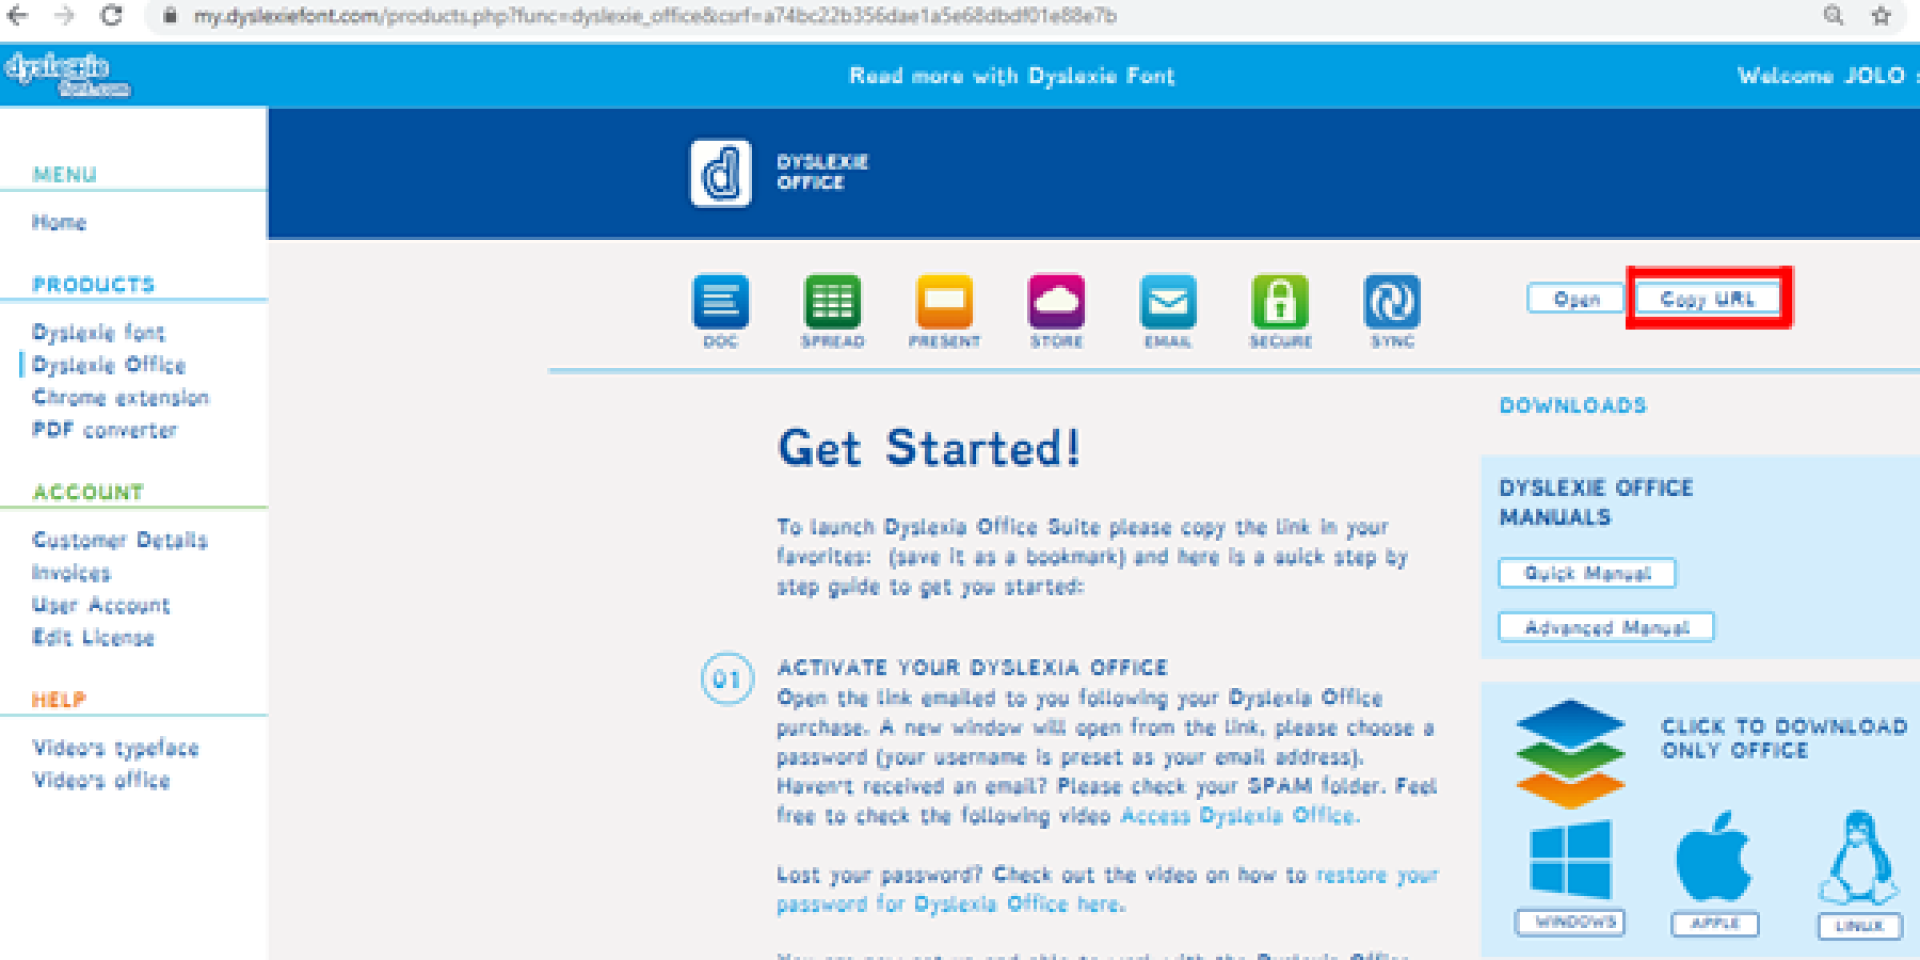
Step 4
Open the Sync Application, called NextCloud. Once you open it, press login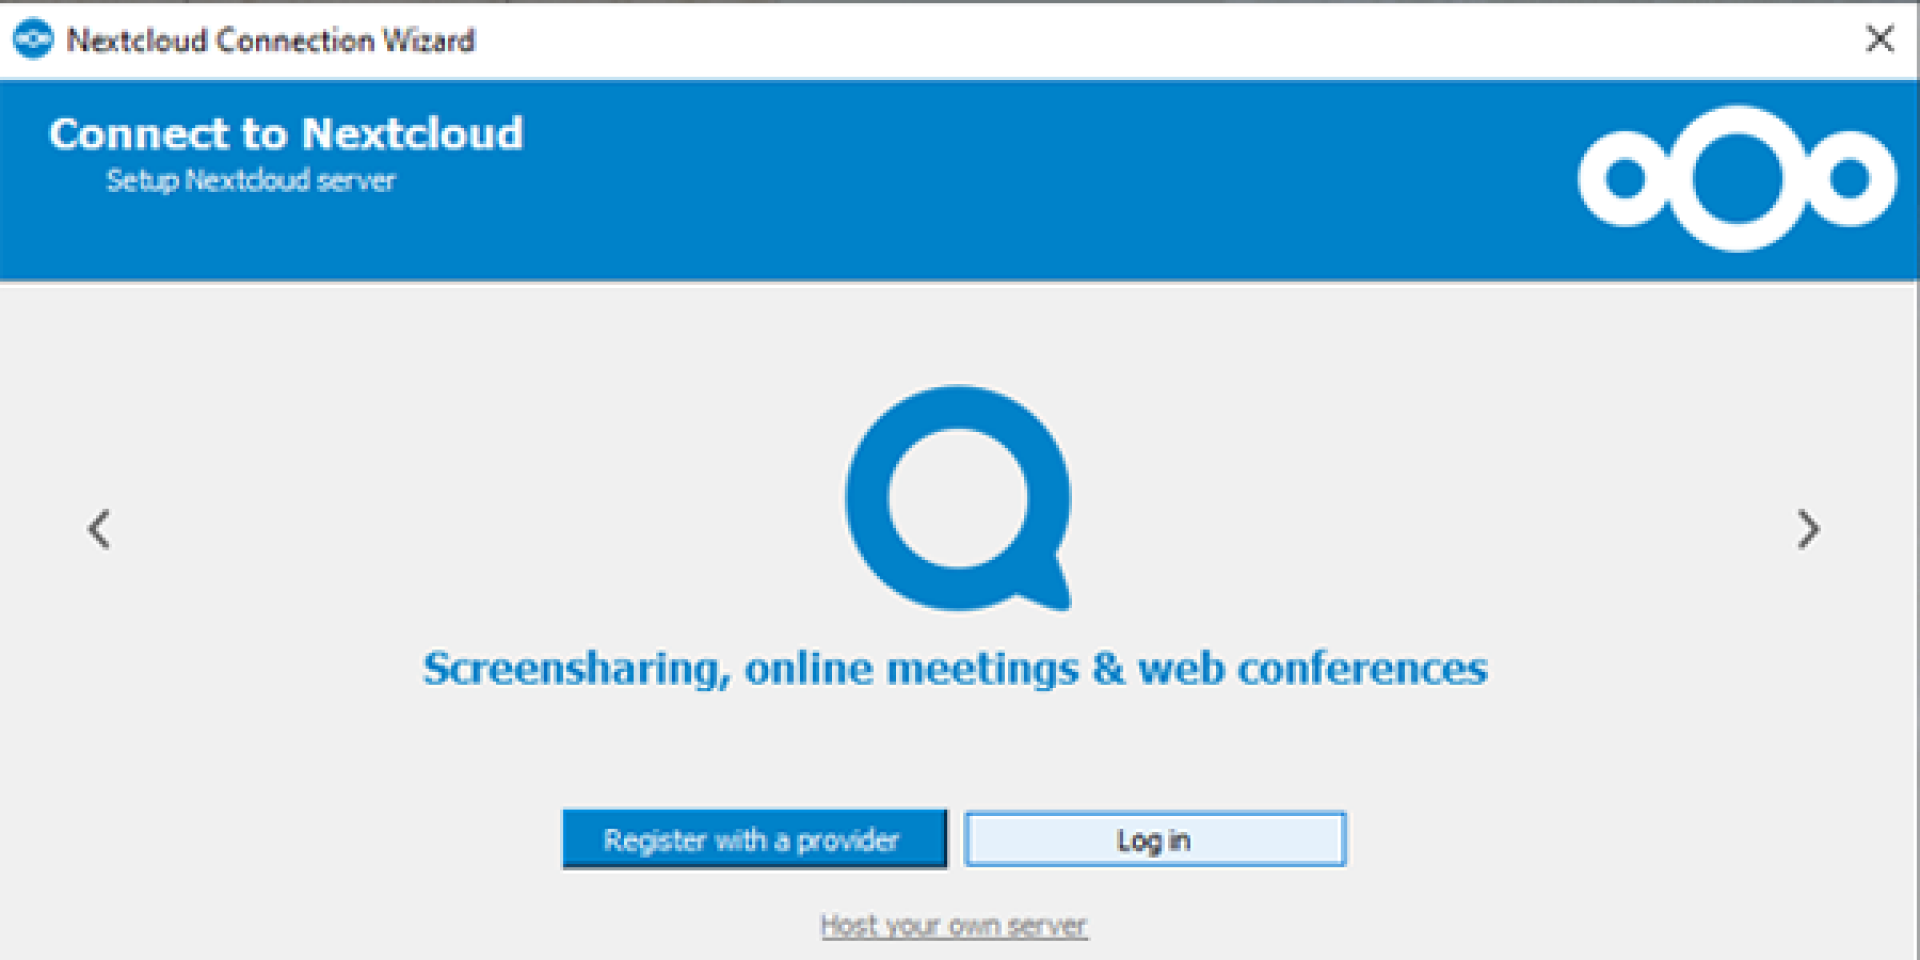
Step 5
Insert the server address (URL) you copied in step 3. Once done, please press next.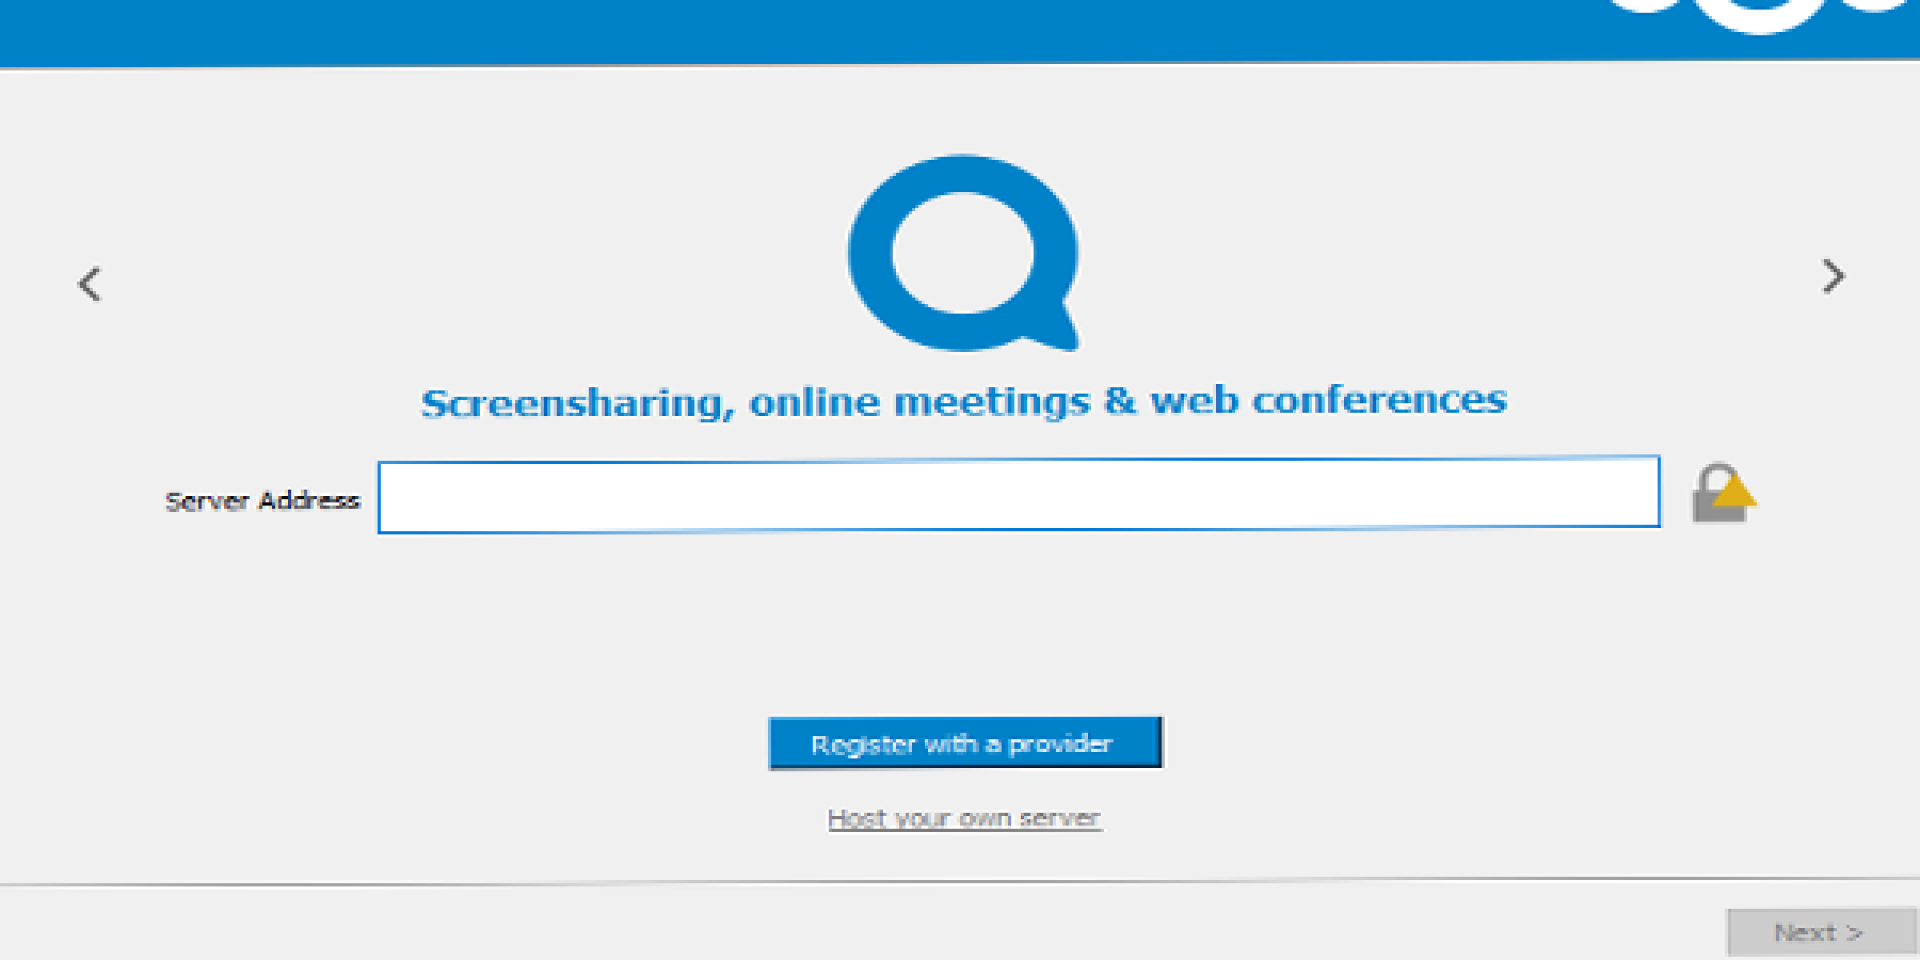
Step 6
It will open up a browser where you need to log in to the Dyslexia Office. Once you have entered the correct details, you can grant access to connect. 
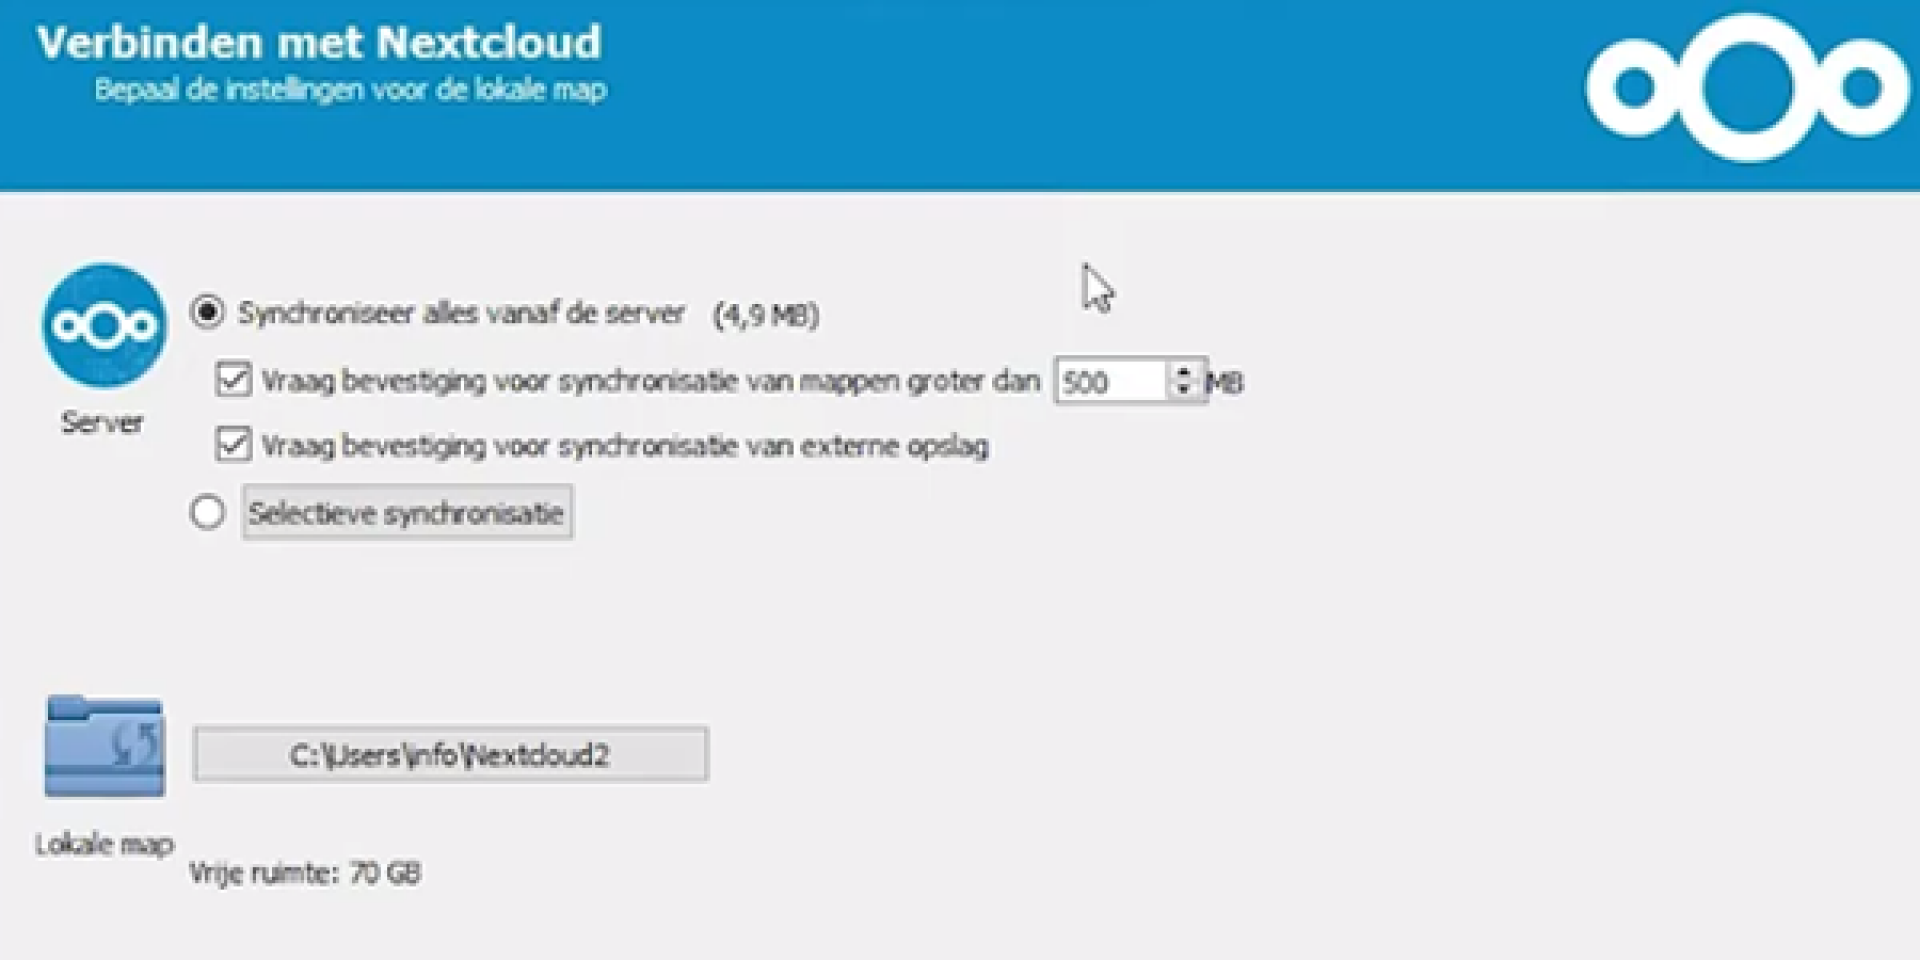
Step 7
You can select your folder where you wish to download the existing documents available in the Dyslexia Office. This folder will become the place where you will save all other files you wish to secure and safely store. Press connect, and you will be done.